Our Theme is localized and it includes a .po and .mo file so you can translate the theme to your own language.
Step 1: Copy Default.po File
Located in the “languages” folder of the theme is a file called default.po. Copy this file to your desktop for editing.
Step 2: Edit Default.po File
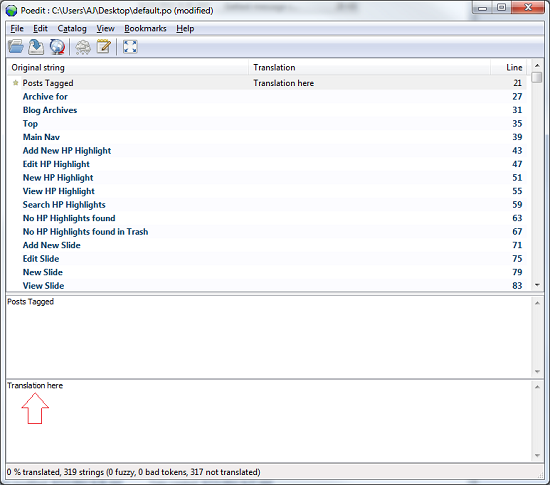
Open the .po file using a program like PoEdit.
Click on the text to edit and enter your translation in the bottom box

Step 3: Save Default.po File
Next, you have to save your .po file using the naming convention is based on the language code (e.g. pt for Portuguese) followed by the country code (e.g. _BR for Brazil). So, the Brazilian Portuguese file would be called pt_BR.po.
When saving your .po it will automatically create a new .mo file for you, with the same naming convention (so using the example above, the file would be called pt_BR.mo)
Step 4: Upload New Files
Upload the .po and .mo files you just created to your /languages folder so they are in the same directory as the default.po and default.mo
Step 5: Edit Your WP-Config File
The last step is to tell WordPress what language to show
Open your wp-config.php file in a text editor and search for:
define ('WPLANG', '');
Edit this line according to the .mo file you’ve just downloaded, e.g. for the Portuguese spoken in Brazil you must add:
define ('WPLANG', 'pt_BR');


